


In the Manage Products tab, all products that have previously been entered into the database will be listed here. Use this tab to add, edit, make active/inactive, or delete products. All active products will display on ESP and Distributor websites. When adding products, please review the ESP Data Standards.
Search, Filter, and Sort Products
Search
Enter the product number, product name or keyword in the search box at the top left of your screen and click the magnifying button. Use quotes in the search field to locate the exact product. You can also search for multiple products by separating them using a comma and a space.
After searching, you will be able to use the filters to narrow your results further using the available options.
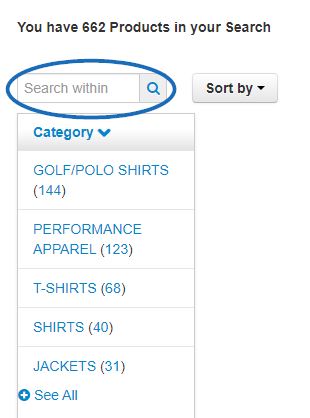
Filter
Filter your products by the criteria listed in the left hand column of the page: category, size, imprint methods, colors and more.
The number in parenthesis is the amount of products which are categorized within the option.
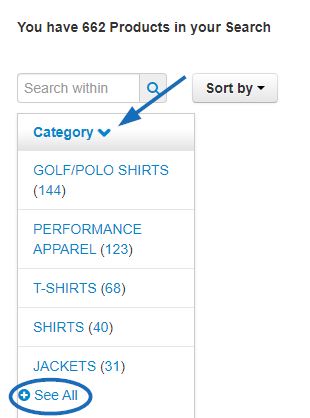
Click on the See All link to view all values within each criterion.
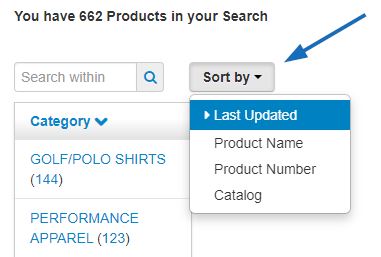
Sort By
Click on the Sort by button and choose to sort your products by either the Last Updated Date, Product Name, Product Number, or Catalog so that they display in the order you prefer.
Edit a Single Product
Edit Product Data
After locating the item you would like to update, click on the Edit button.

This will open the product to the editing tabs:
Copy a Product
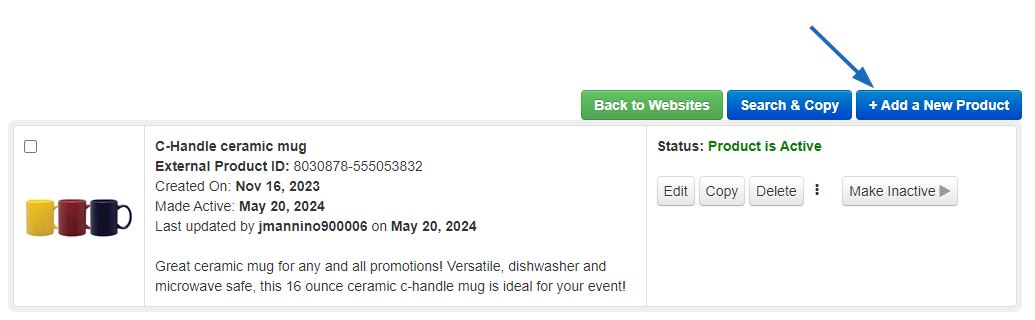
If you need to add a product that is similar to an existing item, use the Copy button. From the Manage Products tab, locate the item that is most similar to the one you wish to add and then click on the Copy button.

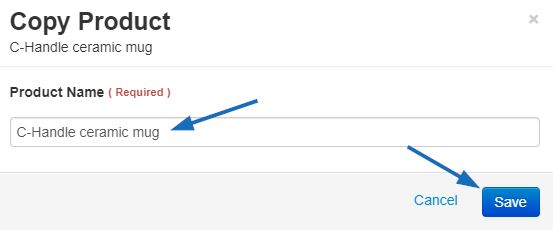
The Copy Product window will open and display the Product Name of the original item. Enter a product name for the new product and then click on the Save button.
The newly created product will automatically open on the Basic Details tab. Edit the product data accordingly. Copied products will be inactive by default, clicking on the Make Active button will add the item to ESP and Distributor Websites.
The copied product will become its own product listing in the Manage Product tab.
Delete a Product
Locate the item and then click on the Delete button.

A confirmation window will appear with the message that deleting the product will permanently remove it from ESP and confirming that this is the correct action. Click on the "Yes, Delete this Product" button to complete the deletion.
Make Active/Inactive
- Make Active
If a product is Inactive, it is still available in ESP Updates, but it is not available on ESP and Distributor Websites. The button on the product listing will show as "Make Active". The arrow enables you to select to make the product active now or set it to be active at a later date.
- Make Inactive
If a product is Active, it is listed on ESP and Distributor Websites. The button on the product listing will show as "Make Inactive" and clicking it will make the item inactive.
Add a New Product
In the Manage Products tab, you can add a new product by clicking on the Add a New Product button.
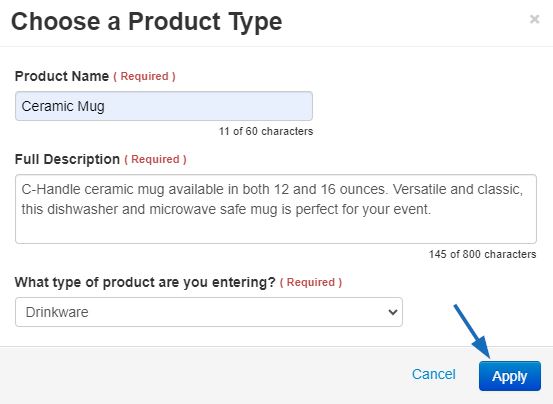
A window will open prompting you to enter a Product Name, Product Description and Type of Product. Type the Product Name and Product Description in the available boxes. Use the “What type of product are you entering” dropdown to select a product type.
Once you are finished entering information, click on the Apply button.
The Adding Details area will open and you can begin entering information about this product in the available sections: