


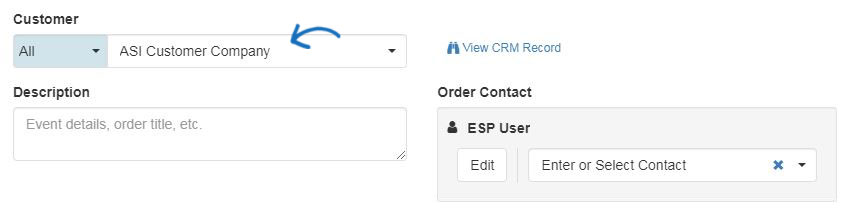
The first step when completing an order is to select your customer from the Customer dropdown. The customer name will automatically be filled in if you are creating an order in ESP Web. You can use the View CRM Record link to open the entire CRM record for the company you selected in a new tab. The Description field is optional and can contain any information you wish to enter.
If you would like to edit the order number, hover on the order number and then click on the pencil icon. Then, type the new order number and click on Save.

Note: Admins are able to change the default order numbers, such as changing the starting number and/or adding a prefix/suffix in the Document Numbers section of the ESP Admin.
If enabled, you can choose the type of order from the dropdown. Select New, Revised, or Reorder.
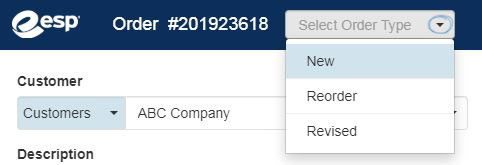
Note: Admins are able to enable this option in the Company Profile section of the ESP Admin.
The status, order total and balance due will also be visible at the top.
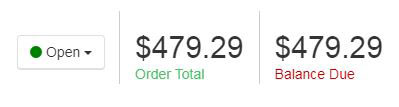
To change the status of an order, click on the current status and all status which are available for your company will be available in the dropdown.

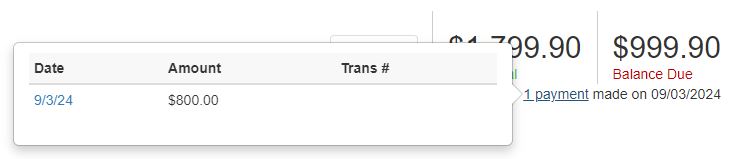
If payments have been made, a link below these totals will be available. Click on the number of payments to view previously entered payments, as shown in the example below.
Next, the user account will be shown as the Sales Person, but you can enter additional representatives as needed. Use the PO Reference number box to include a purchase order reference number.

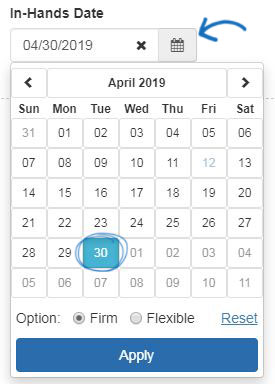
Next, use the calendar icon to select the dates:
- Order Date: Date the order is initially created.
- In-Hands: Date by which the customer needs to have the items delivered. Use the radio buttons to designate the In-Hands Date as firm or flexible.
- Ship Date: Date the items need to ship by.
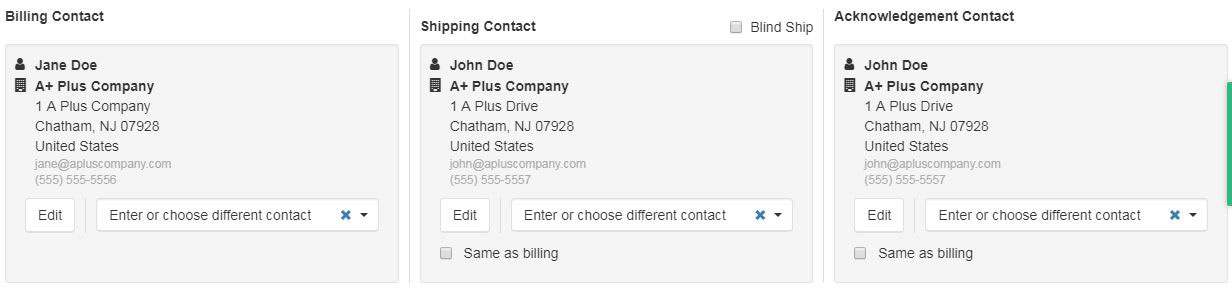
There are three available address boxes: Billing, Shipping and Acknowledgement. If you have already designated primary contacts for these fields, they will be automatically entered. If not, use the dropdown to select the appropriate address. You can begin entering the contact address in the dropdown and it will do a partial match search as you type. When selecting contacts, related contacts will be displayed first. Related contacts consist of any records within the CRM which have a link to the Customer selected for the order.
If you have not entered address information for the contact, you can click on the Edit button to add it on the fly.
Note: Information entered on a sales document will not be saved within the CRM customer information.
After adding the contact addresses, we use the dropdowns to set the Terms, Pay With and Ship Via options. You can enter a Shipping Account number in the Account box, such as your UPS shipper number.

There are buttons available for Pricing, Decoration, Shipping or Purchase Orders to edit the information.
The Create Invoice button will open an invoice that is linked to the sales order. All of the information from the sales order will carry through to the invoice, but you are able to edit it.

Below the main buttons, there are also options available to:
- Add Product: Add a product into this order from the Clipboard, Shopping Cart, Projects, or ESP Search. You can also click on the arrow to add a blank product which can be fully customized with the Edit Product window.
- Add Service: Add service line items from the supplier, such as freight or shipping, distributors will now have the option to enter notes for the vendor which will appear on the purchase order. You can enter notes on individual service line items which can be viewed by the vendor only or shared with both the supplier and the customer.
- Add Title: Will create a text field between the products and the subtotal area.
- Import Line Item: Enables you to import line items from an item previously used within ESP Orders.
If you would like to import line items from an item previously used within ESP Orders, click on the Import Line Item button. Then, locate the item and select it.
The item's configurations will be available in the Edit Product window. Shipping and Sales Tax will not be imported.
Each product within the order will be listed. Hovering on a product listing will display the Edit, Copy and Delete options for that product. The Edit button enables you to manage the product information. Clicking the Copy button will create an additional listing with the same configuration as the original product. Delete will remove the product from the order.
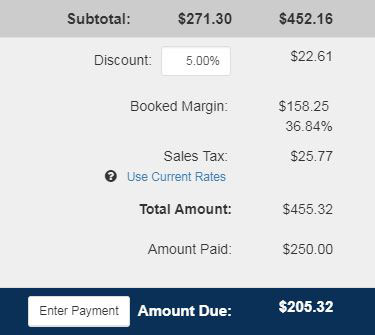
The Subtotal section will display a summary of all the charges, discounts, and taxes within the order. In this section, you will see:
- Subtotal: The total for goods before taxes.
- Discount: If a discount should be applied to this order, enter the percentage in the available box.
- Booked Margin: The booked margin will show both the dollar amount and percentage of the margin.
- Sales Tax: If you have enabled Sales Tax for your state or province, the dollar amount will be displayed.
- Total Amount: The total dollar amount due to you from the customer.
- Amount Paid: If the you have entered payment(s) on this order, the total amount of all payments wil be shown.
- Amount Due: The total dollar amount due to you from the customer after payments have been taken into account.
At the bottom, there are order management options available on the toolbar:

- Cancel: Discards the order.
- Preview: Opens a new tab with a full preview of the order.
- More:
- Manage Currency: Change the type of currency used for this order.
- Delete Order: Delete the order.
- Reorder: Copies the order and links to the original. It is important to review pricing before placing a reorder.
- Create Quote: Use the information within this order to create a new quote.
- Send to ASI SmartBooks, Send to ASI ProfitMaker, Send to Quickbooks: If you have integrated your ESP Orders account with any or all of these services, you will be able to use the link here to send the information within this order to that service.
- Send: Send the order to the supplier(s).
- Save: Saves the order to the order manager.
Manage the Order Currency
You are able to manage the currency for all order information by hovering on the More option at the bottom and select "Manage Currency".

On the Manage Currency window, select US or Canadian dollars and then enter the exchange rate. This will update the pricing information for the entire order. If you create a new product after changing the currency, the pricing for that item will be displayed in the selected currency. For example, if you have set the order currency to Canadian dollars and then create a new product, the pricing for that item will automatically be in Canadian dollars.

 Français
 Español