


To edit the information for a product on a sales order, click on Pricing in the order.
There are three buttons below the Pricing tab:

- Add Product:
- Click on Add Product to select a product from the Clipboard, Shopping Cart , Projects or Product Search.
- Use the dropdown and select New Product to add a custom product.
- Add Service:
- Click on Add Service to add a service.
- Use the dropdown to select Freight, Shipping & Handling or Service Charge.
- If you want to add a charge related to imprinting or decoration services, click on the Decoration button.
- Add Title
- Assign a title to this order.
Configure or Edit the Product Information
Each product will be listed individually within the order. Depending on where the product has been added from, hovering on a product listing will display the Configure or Edit option, as well as Copy and Delete. Click on Edit button to open the Edit Product window and modify any information regarding the product.

Hovering on the image will display the Edit button. Click on the Edit button and select to either use the supplier provided image, upload a new image from your computer, or remove the image from the order.

Below the product image are the product number, name and description boxes which enable you to enter or edit the text. The supplier will be displayed below the product description box and cannot be edited.

There are five tabs in the Edit Product window:
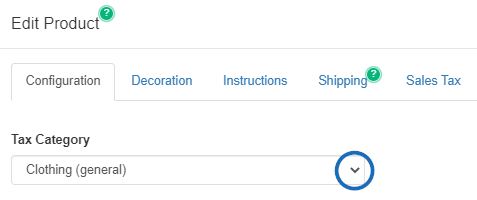
Configuration
In the Configuration tab, the first option is for Tax Category. This dropdown enables you to indicate that a product may be exempt from taxation without modifying any default settings. Select the appropriate tax category for the item, then click on Save when you are finished.
Click here to see a short video on how this dropdown can impact order information!
It is important to keep in mind that for the most accurate information, you will need to ensure that the Sales Tax section of Settings contains proper address information and you have enabled the "Automatically calculate taxes" option.
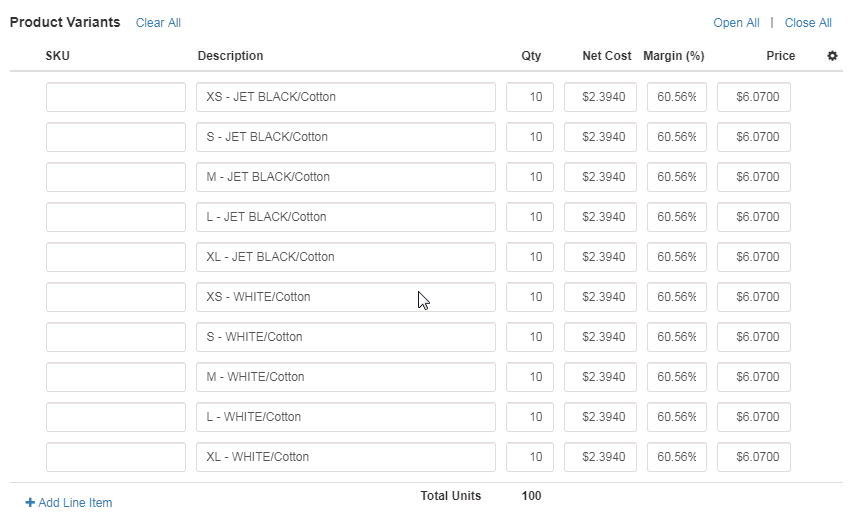
The next section, Product Variants, displays the descriptive information about the item (such as size or color) as individual line items. If the product is available with multiple variants, each combination will be displayed as an individual line item within the Configuration section. Each variant will have an attributes dropdown which will enable you to configure it. You can also use the Add Custom Product Attribute link to create a new line item attribute for a variant.
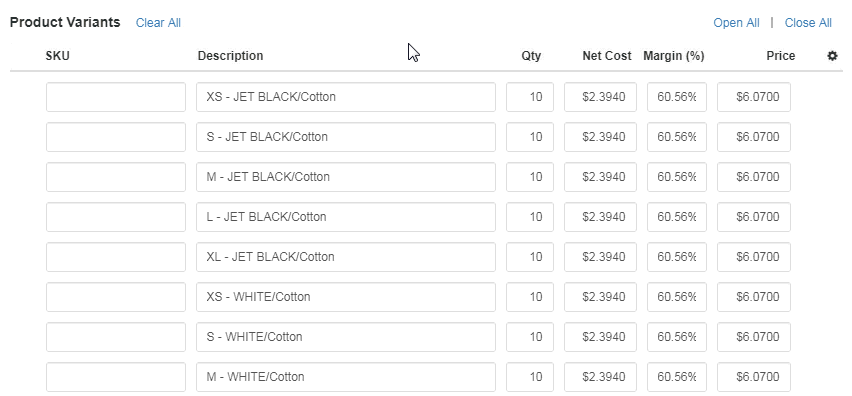
You can also edit the quantity, net cost, margin, and price for each line item. The Total Price and Total Cost will automatically recalculate to accurately reflect the modified quantity information. Click on the Add Line Item option to create a new line item. Hovering on a line item or variant attributes will display an “X” at the end of the line which you can click to delete that line item.
Drag and drop line items to reorder how they are listed. In the example below, a T-shirt has been added, but the line items are grouped by color. Using the new drag and drop capability, the line items have been grouped by size.
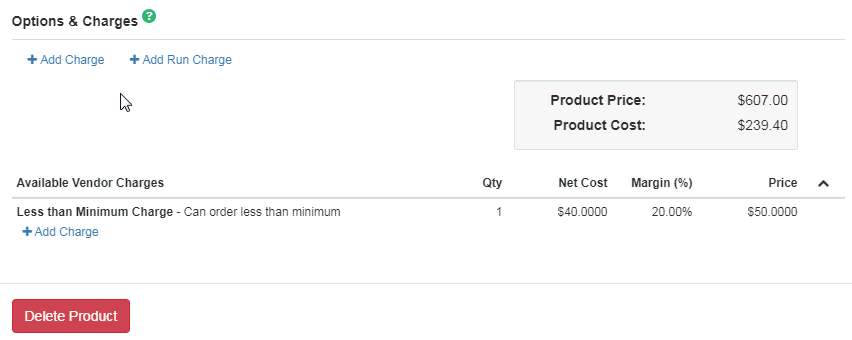
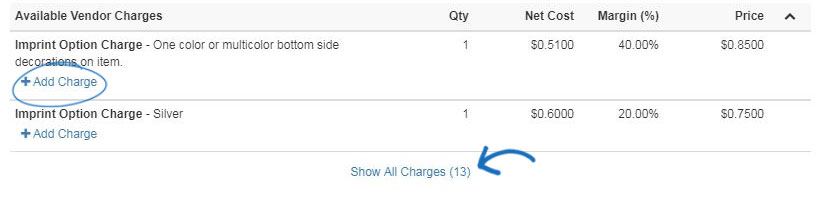
Below the product variants, you are able to view any charges that the vendor has included with the product, as well as use the Add Charge link to include your own or click on the Add Run Charge link to set a run charge for all variants. The available vendor charges for the variants will be listed in the Available Vendor Charges section. Use the Add Charge link to edit the listed charge. To delete a vendor charge, hover on the charge listing and click on the "X" button that appears.
Please keep in mind that the charges listed in the Available Vendor Charges section are listed for use on your order, but will be not be applied unless they have been manually added to the order. Only the charges listed directly below the "Options & Charges" section will be applied to the order.
All updates, additions, and deletions will be automatically saved if you move into another tab. Clicking on the Save button will close the Edit Product window, so you will want to make all of your changes prior to clicking on the Save button.
Decoration
In the Decoration tab, you can enter information regarding the imprinting options for this product.
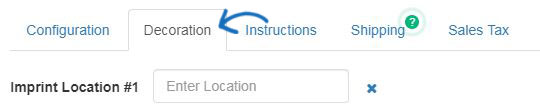
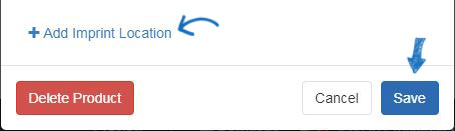
Within the Decoration tab, all the imprinting information is sectioned by the location. Use the Enter Location area to state the location of the imprint on the product. If you need to enter additional imprint locations, use the Add Imprint Location link at the bottom.
The Decoration dropdown enables you to apply any saved decoration information. If you use a previously saved decoration configuration, all information will automatically be filled in. Use the Decorator dropdown to select a company. Then enter Vendor Notes and use the checkbox to make these notes visible on customer facing documents.
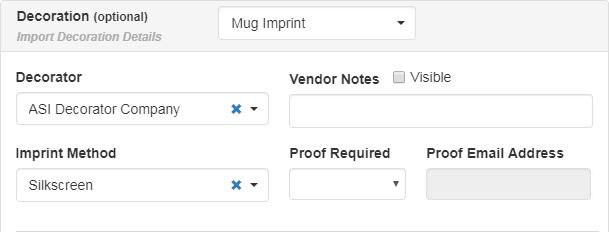
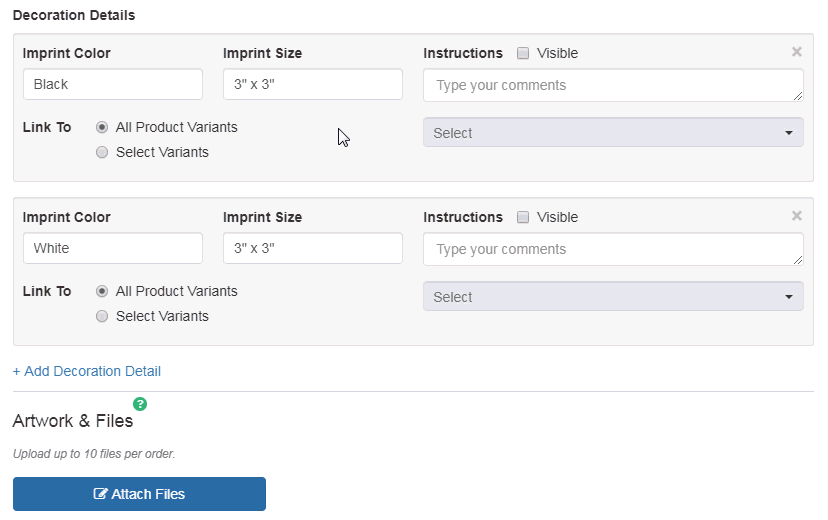
Use the additional fields to enter information regarding imprint method, proof requirements, imprint color, imprint size and instructions.
The Link To section enables you to select whether the decoration information should be applied to all product variants (colors, sizes, materials, etc) or use select variants. If you select specific variants, click into the Select box and click an available option.
For example, you are ordering T-Shirt in both black and white. A white logo on a black shirt will display well, but it would not work on the black shirt. You can use the Link to options to select specific variants for certain imprint colors. For the white imprint color, choose to Link to Select Variants and then use the Select options to choose all sizes of black T-Shirt within this order. Next, add an imprint color and repeat this process for the white T-Shirts by choosing Select Variants, and then choose all of the white shirts within the order.
Artwork & Files
Next, in the Artwork & Files section, you can upload artwork and other files related to imprinting, such as an excel file for personalization. If you are using a saved decoration configuration and have included artwork and/or files, they will be automatically included. If you are not using a saved decoration configuration, click on the Attach Files button, browse your computer, select the file and then click on Open. You can attach up to ten files. The allowed file types are: png, tif, jpg, pdf, dst, eps, ai, doc, docx, txt, csv, pdf, svg, xls, and/or xlsx. If you have created or saved a design, you use use the "Enter or Select from CRM" dropdown to browse the Designs section of the customer's listing in CRM.

Hovering on uploaded artwork will display a small toolbar. You can select from three options:
- Preview: Opens the image in full size. Click on the image to close the preview.
- Download: Will download the image to your computer.
- Delete: Removes the image from this order.
Additionally, below each uploaded file, there is a Visible checkbox. If the visibility checkbox is marked, the artwork will be included on all sales documents. If the Visible box is not checked, the artwork will only appear on supplier facing documents.
In the Decoration Charges section, click on the Add Run Charge or Add Run Charge to create a line item for the additional upcharge. The visible checkbox will automatically display as selected, meaning this charge will be shown on all sales documentation. If there is no pricing information included with the charge, you can uncheck the Visible checkbox so this information will not display on the customer documentation, only the purchase order.
To apply the new charge for each item, check the Run box. The "Qty" (Quantity) box will be grayed out and the number of items will be updated to the amount of items within the order.
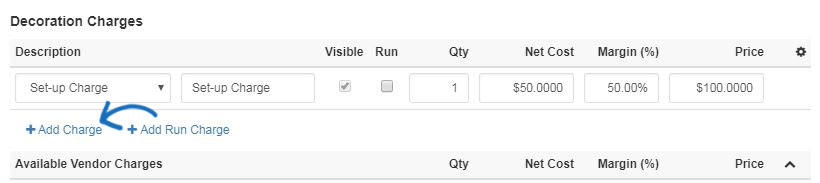
If the vendor has provided charges, they will be listed in the Available Vendor Charges section. These charges will not be applied to the order until you click on the Add Charge link below the charge itself.
To save the decoration configurations for this customer, in the Save Decoration box, name the decoration, enter a description (if desired) and then click on the Save Decoration button.

To include another imprint location, click on the Add Imprint Location link. You will be able to configure the additional location using the options detailed above.
All updates, additions, and deletions will be automatically saved if you move into another tab. Clicking on the Save button will close the Edit Product window, so you will want to make all of your changes prior to clicking on the Save button.
Instructions
In the Instructions tab, you are able to include specifications on any of the order types.
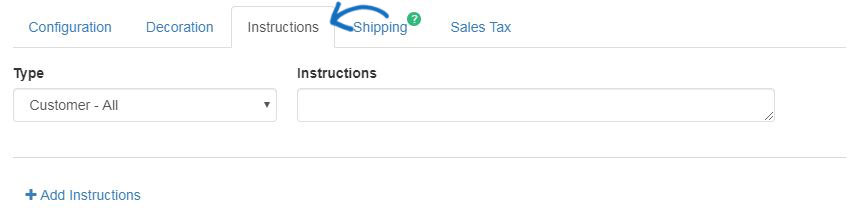
Use the Type dropdown to select the type of documentation, such as the acknowledgment or the invoice, for which you would like include instructions. You can click on the Add Instructions link to create further instructions as needed.
Click on the "X" to the right of a listing to remove an instruction.
All updates, additions, and deletions will be automatically saved if you move into another tab. Clicking on the Save button will close the Edit Product window, so you will want to make all of your changes prior to clicking on the Save button.
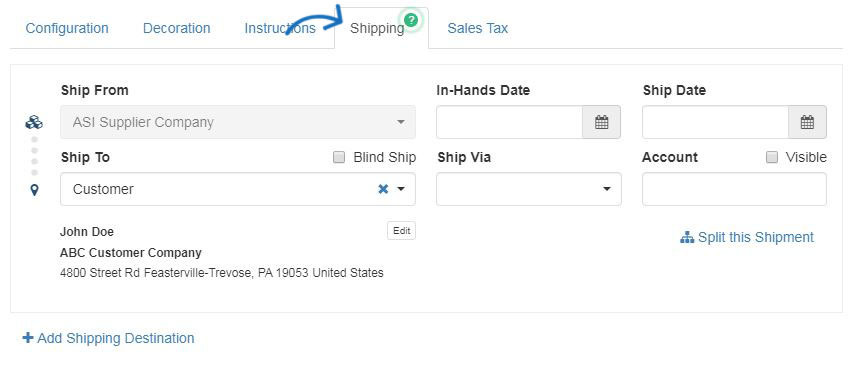
Shipping
In the Shipping tab of the Edit Product window, you can see the shipping path for the product.
Use the Ship To dropdown to select a contact for shipping. If the shipment should not include any supplier information, check the Blind Ship checkbox. You are also able to enter an In-Hands Date and a Ship Date by clicking on the calendar icon and selecting the date(s). Use the Ship Via dropdown to select the shipping service you would like to use and enter your account information in the Account box.
Use the "X" in the Ship To and Ship Via boxes to clear these fields.
How do I send an order for decoration?
All updates, additions, and deletions will be automatically saved if you move into another tab. Clicking on the Save button will close the Edit Product window, so you will want to make all of your changes prior to clicking on the Save button.
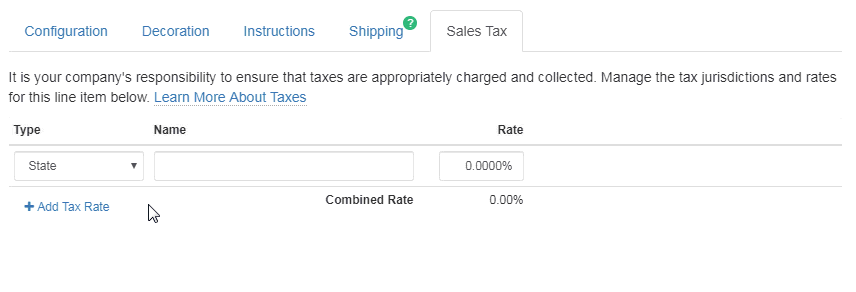
Sales Tax
In the Sales Tax tab, you can establish sales tax information for this product.

Please keep in mind that it is your company's responsibility to ensure that taxes are appropriately charged and collected. Click on the Add Tax Rate link to input the tax information for the product. Use the dropdown to select the type of tax and then enter a name and rate. You can use the Add Tax Rate link to add multiple taxes if needed.
All updates, additions, and deletions will be automatically saved if you move into another tab. Clicking on the Save button will close the Edit Product window, so you will want to make all of your changes prior to clicking on the Save button.
At the bottom of the Edit Products window, there are three buttons:
- Delete: Remove the product from the order.
- Cancel: Close the Edit Products window without saving modifications and return you to the order form.
- Save: Save any updates made in all tabs, close the Edit Products window and return you to the order form.
 Français
 Español