


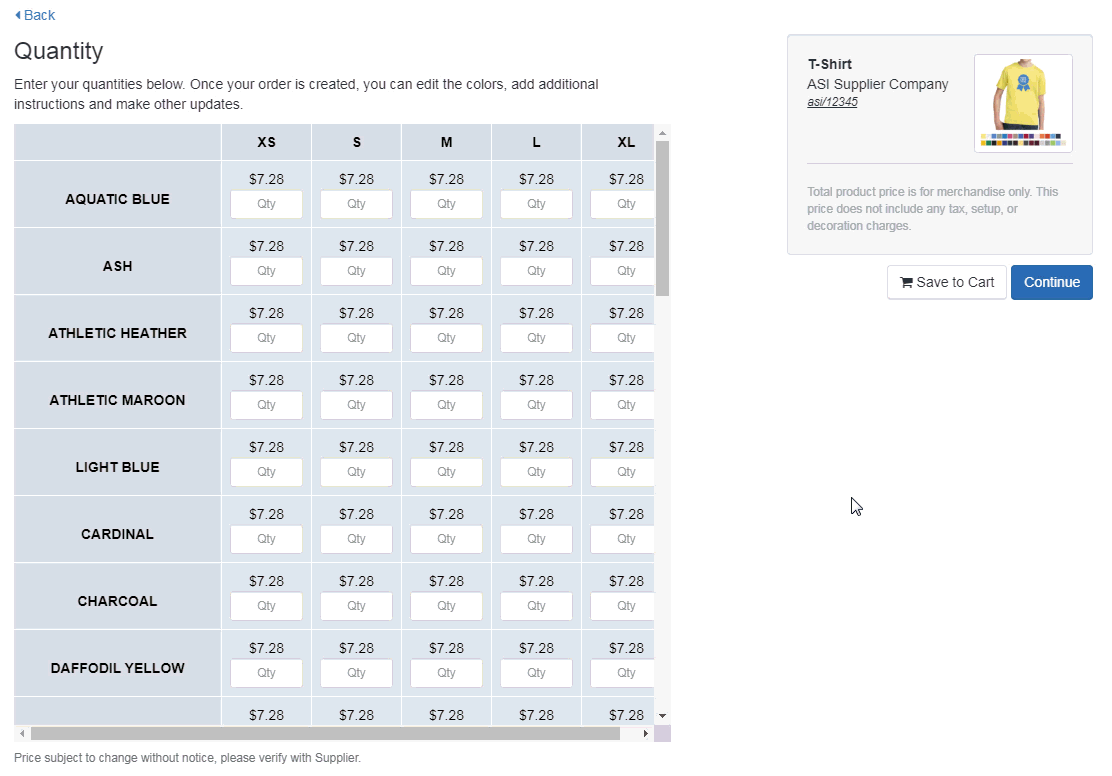
When ordering a product within ESP, you will need to configure. Depending on the item's attributes, you may have to select specific options. For example, a T-Shirt may have different options, such as colors or sizes, from which you will need to choose prior to being able to enter the quantities.
After making selections, you will need to enter the quantity for each available option in the box below the attribute. The Order Summary will appear to the right, displaying the total product cost, price, and margin. After entering the quantities for options you would like to order, click on the Continue button.
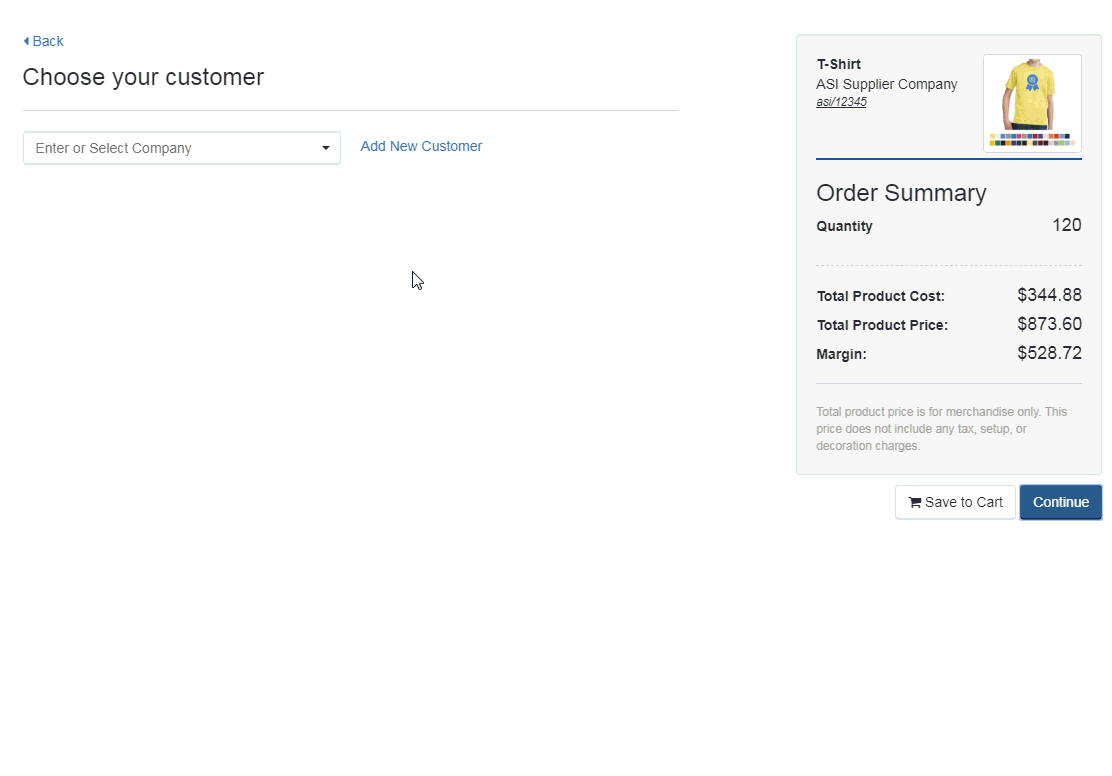
Next, in the Choose your customer area, use the dropdown to select a customer from CRM. You can begin typing the customer's name and all matching results will appear. Click on the listing for the company you would like to use. If the company does not yet existing in your CRM, you can use the Add New Customer link to create one on the fly. After choosing the customer, click on the Continue button.
Use the dropdown to select your customer.
Note: If you are working with a new customer, click on the Add New Customer link. You will be able to enter the customer's name and then click on Create Customer. Next, click on the Continue button.
In the Decoration section, you can enter information regarding the imprinting options for this product. If you have previously saved a decoration configuration for this customer, you will be able to use the Decoration dropdown to select the configuration.

Use the Decorator dropdown to select a company. Then enter Vendor Notes and use the checkbox to make these notes visible on customer facing documents. Use the additional fields to enter information regarding imprint method, proof requirements, imprint color, imprint size and instructions.

Artwork & Files
Next, in the Artwork & Files section, you can upload artwork and other files related to imprinting, such as an excel file for personalization. If you are using a saved decoration configuration and have included artwork and/or files, they will be automatically included. Also, if you have previously saved artwork to the customer's account in CRM, you can use the dropdown to select from available image files.
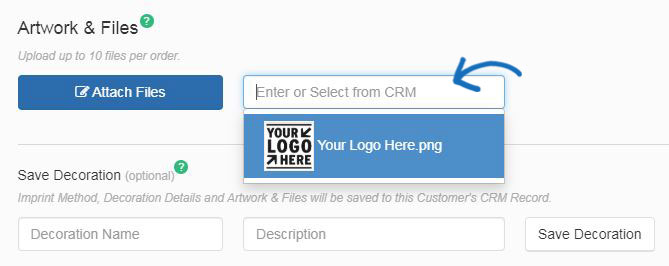
To upload a new artwork file, click on the Attach Files button, browse your computer, select the file and then click on Open. You can attach up to ten files. The allowed file types are: png, tif, jpg, pdf, dst, eps, ai, doc, docx, txt, csv, pdf, svg, xls, and/or xlsx.
Hovering on uploaded artwork will display a small toolbar. You can select from three options:
- Preview: Opens the image in full size. Click on the image to close the preview.
- Download: Will download the image to your computer.
- Delete: Removes the image from this order.

To save the decoration configurations for this customer, in the Save Decoration box, name the decoration, enter a description (if desired) and then click on the Save Decoration button. The decoration will be saved in the Design section of the customer's CRM record.

Note: This section enables you to enter the decoration information for one location imprinting, however, you will be able to enter additional locations during the order configuration process.
After you have finished configuring the decoration options for this product, click on the Create Order button. Then, begin filling in the order form.
 Français
 Español