


Within the Pricing tab, you are able to add, edit, or remove pricing information for both base prices and upcharges. You are also able to :
Use a Single Price Grid
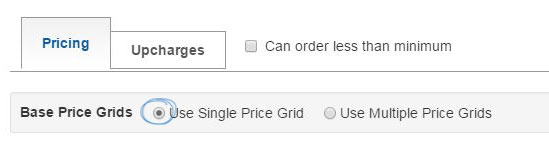
ESP Updates defaults your pricing to "Use Single Price Grid". You can select the Use Multiple Price Grids when your product has multiple attributes (sizes, colors, materials, etc) that require their own pricing grids. To add product pricing in a single price grid format, go to the Pricing tab and select "Use Single Price Grid".
By entering a single price grid, you are indicating that all of the attributes (sizes, imprinting, etc) for this product are based on one price.
Now, you are ready to enter the quantities and pricing for this product. Enter the pricing information in the appropriate boxes. There are two basic rules:
- Quantities must go from lowest to highest.
- List Prices and Net Costs must go from highest to lowest.

Use the Price Codes dropdown to select the discount code. The system will then calculate the net cost automatically. If the same price code applies to all the quantities in this price grid, check the Apply to All checkbox.
The List Price per Piece will be automatically calculated based on the sold per unit.
In the Price Includes box, indicate what is included in the base prices. For example, if the base price includes a one color, one location imprint, type “1 color, one location imprint” in the Price Includes field.

Use Multiple Price Grids
Multiple Price Grids Based on One Attribute
Use Multiple Price Grids when your product has multiple prices based on an attribute, option, packaging or even production/rush time. If the pricing is based on a combination of two attributes, such as size and color, please review the "Multiple Price Grids Based on Two Attributes" section below.
To use Multiple Price Grids, click on the Pricing Tab then select the "Use Multiple Price Grids" option.

After selecting the "Use Multiple Price Grids" option, the Multiple Price Grid Setup window will display all available criteria for base pricing. For example, if the product is a T-Shirt and the pricing is based on the color because the basic white T-Shirt is less costly than the colored shirts, two price grids are needed.
To set up two price grids based on color:
- Check the Product Color box. The number of possible variations will be shown in a grey bar below the checkboxes.
- Click on the Next Step button.
- Check the options for the first price grid. In the example with the T-Shirt, one price grid is needed for the white shirt and one is needed for the colored shirts. Check the box for "White".
- Click on the Save & Add Another Configuration button. This will create a price grid for the white and then clear the checkboxes so the criteria for the second price grid can be selected.
- Check the colors for the second price grid.
- Click on the Save Configuration button.
There will now be two price grids available for base pricing.
Now, you are ready to enter the quantities and pricing for this product. Enter the pricing information in the appropriate boxes. There are two basic rules:
- Quantities must go from lowest to highest.
- List Prices and Net Costs must go from highest to lowest.
Use the Price Codes dropdown to select the discount code. The system will then calculate the net cost automatically. If the same price code applies to all the quantities in this price grid, check the Apply to All checkbox.
The List Price per Piece will be automatically calculated based on the sold per unit.
In the Price Includes box, indicate what is included in the base prices. For example, if the base price includes a one color, one location imprint, type “1 color, one location imprint” in the Price Includes field.
Multiple Price Grids Based on Two Attributes
Use Multiple Price Grids when your product has multiple prices based on a combination of two attributes. Please keep in mind, two is the maximum number of attributes which can be used for base pricing. An example of two attributes would be size and color. If the pricing is based on one attribute, such as color, please review the "Multiple Price Grids Based on One Attributes" section above.
To use Multiple Price Grids, click on the Pricing Tab then select the "Use Multiple Price Grids" option.
After selecting the "Use Multiple Price Grids" option, the Multiple Price Grid Setup window will display all available criteria for base pricing. You can add as many price grids as needed. For example, if the product is a T-Shirt and the pricing is based on the color and the size because the basic white T-Shirt is less costly than the colored shirts, plus both options are available in standard and extended sizes, four price grids are needed.
To set up four price grids based on color and size:
- Check the Size box and then check the Product Color box. The number of possible variations will be shown in a grey bar below the checkboxes.
- Click on the Next Step button.
- Check the options for the first price grid. In the example with the T-Shirt, the first price grid is for the white shirt in standard sizes. Check the box for "White" and then check sizes "XS" through "XL".
- Click on the Save & Add Another Configuration button. This will create a price grid for the white shirt in sizes XS-XL and then clear the checkboxes so the criteria for the second price grid can be selected.
- The second price grid is for the white shirt in extended sizes. Check the box for "White" and then check sizes "2XL" through "4XL".
- Click on the Save & Add Another Configuration button.
- The second price grid is for the colored shirts in standard sizes. Check each color box and then check sizes "XS" through "XL".
- Click on the Save & Add Another Configuration button. This will create a price grid for the white shirt in sizes XS-XL and then clear the checkboxes so the criteria for the second price grid can be selected.
- The fourth price grid is for the colored shirt in extended sizes. Check each color box and then check sizes "2XL" through "4XL".
- Click on the Save Configuration button.

There will now be four price grids available for base pricing.
Now, you are ready to enter the quantities and pricing for this product. Enter the pricing information in the appropriate boxes. There are two basic rules:
- Quantities must go from lowest to highest.
- List Prices and Net Costs must go from highest to lowest.
Use the Price Codes dropdown to select the discount code. The system will then calculate the net cost automatically. If the same price code applies to all the quantities in this price grid, check the Apply to All checkbox.
The List Price per Piece will be automatically calculated based on the sold per unit.
In the Price Includes box, indicate what is included in the base prices. For example, if the base price includes a one color, one location imprint, type “1 color, one location imprint” in the Price Includes field.
Filling in the Price Grid
Enter the pricing information in the appropriate boxes. There are two basic rules:
- Quantities must go from lowest to highest.
- List Prices and Net Costs must go from highest to lowest.
Use the Price Codes dropdown to select the discount code. The system will then calculate the net cost automatically. If the same price code applies to all the quantities in this price grid, check the Apply to All checkbox.
The List Price per Piece will be automatically calculated based on the sold per unit.
In the Price Includes box, indicate what is included in the base prices. For example, if the base price includes a one color, one location imprint, type “1 color, one location imprint” in the Price Includes field.
Check the "Set as Quote Upon Request - QUR" box to provide pricing only upon request. This is not recommended.
Pricing Options & Price Grid Management
Less Than Minimum
Use the checkbox to indicate that the product can be ordered in quantities below the standard minimum.
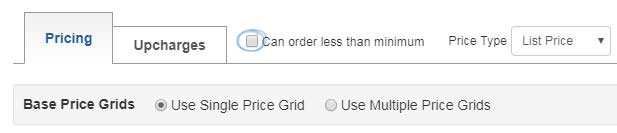
Price Type
Use the price type dropdown to select how you would like to enter pricing - using the list price, net cost, or both. By default, ESP Updates will be set to List Price.

The price type determines which fields are available and which are greyed out in the price grid(s). For example, if you select to enter Net Cost, then the List Price fields will be greyed out and automatically calculated based on the value entered in the net cost and the price code. If "Both" is selected, then you will be able to manually enter pricing in the List Price and Net Cost sections, meaning the Price Codes do not apply and therefore, they will be greyed out. The List Price per Piece will always be automatically calculated by ESP Updates based on the sold per unit.

Currency Type
ESP Updates now provides Suppliers with the ability to enter pricing for multiple currencies on a single product listing. All price grids must have at least one currency type selected. To enter multiple currencies, select the currencies you would like to use from the Currency Types dropdown and then click on Enter.
Note: Currency Types must be selected on the Pricing tab, they cannot be selected from the Upcharges tab.
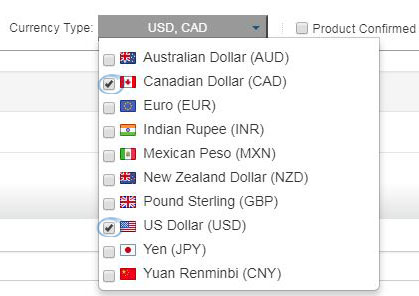
Note: You are able to select more than one currency option, but only US (USD) and Canadian CAD) currency is currently supported in ESP Web.
If you have selected to use multiple currencies, the price grids will be displayed together.
Two price grids will be shown. The Price Includes and Quantity fields appear above the price grids and will apply to both currencies. Then, enter the pricing for each type of currency.
Note: The Quote Upon Request (QUR) checkbox can be selected independently, meaning pricing can be entered for one currency and set as QUR for the other.
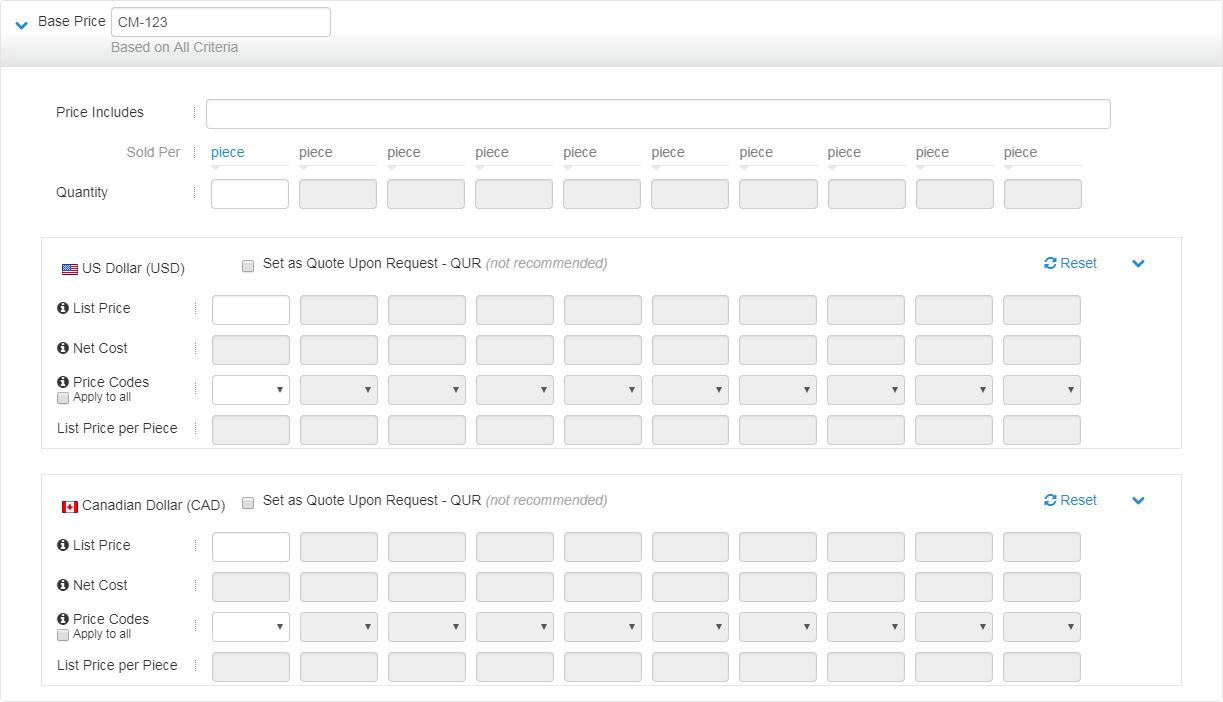
Once an additional currency type is selected, a price grid for the new currency type will be populate to all the base prices and upcharges associated with the product in the order it was selected from the dropdown. This means if USD was selected first and CAD was selected second, the price grids will display with USD first, then CAD.
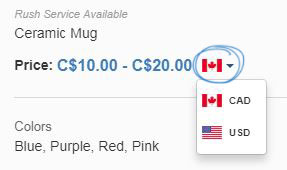
If pricing has been added into the multiple currency price grids, distributors will be able to select which pricing to view in ESP Web. A currency dropdown will appear on the Detail view within ESP enabling distributors to view the price grid in the currency they need. An example of this dropdown is shown below.
When you are finished, click on the Save button and then click on the Make Active button to make the changes live.
Product Confirmed
Use the Product Confirmed through checkbox to confirm that the pricing is accurate through a specific date. Click the calendar icon to change the "confirmed through" date. By default, the confirmed through date will be set to one year from the current date. Uncheck the box if you do not want to indicate that your product data is confirmed.

Sold Per Unit
By default, ESP Updates will indicate that the product is sold per "Piece". However, you can click on the "Piece" link to select the units in which your product is sold. If the product is sold in a case or roll, use the text box to enter the number of items within each unit (case, roll, etc). The sold per unit is used to calculate the List Price per Piece.
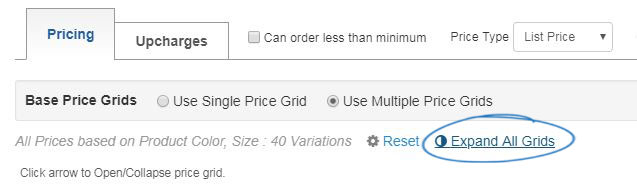
Viewing and Organizing Price Grids
To expand or collapse a price grid, click on the arrow.
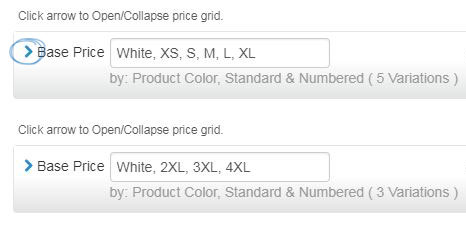
To expand multiple price grids, click on the Expand All link.
You can choose which price grid you want to display first by clicking the reorder arrows to the right of the price grid. For example, if the product is a T-Shirt which has four price grids, we can use the arrows on the right to move a price grid up or down in the order. In the example, the price grids are in the following order:
- White - Standard Sizes (XS-XL)
- White - Extended Sizes (2XL-4XL)
- Colors - Standard Sizes (XS-XL)
- Colors - Extended Sizes (2XL-4XL)
To re-organize the price grids so that the sizes are together, click on the arrows to the right. In the example below, the colored shirts in standard sizes is being moved up one spot, which automatically moves the white shirts in extended sizes down.
This makes the price grids have the following order:
- White - Standard Sizes (XS-XL)
- Colors - Standard Sizes (XS-XL)
- White - Extended Sizes (2XL-4XL)
- Colors - Extended Sizes (2XL-4XL)
It is at your discretion how to organize multiple price grids.
Reset and Delete Pricing
There are two ways to remove pricing information for a single price grid: Reset and Delete. Both links are located in the lower right corner of the price grid.
- Reset will remove pricing information, but keep the price grid. To reset price grid information, click on the Reset link.

- Delete: Will delete the price grid completely. To remove a price grid, click on the Delete link.

If there are multiple price grids for a product, use the Reset option above the price grids to clear all pricing information and start over with pricing. This reset link will remove all previously created base price grids.

Copy Pricing Information
When using multiple price grids, sometimes pricing is similar. To copy the pricing information from one price into another and then tweak it, use the Copy dropdown in the lower right corner of the price grid. Select the price grid you would like to use and then click on the Copy link. The pricing information will be filled in and ready for you adjust.
