To upload product images or videos in ESP Updates, go to the Media tab.

In the Media tab, you are able to upload product images and tag them with criteria and/or media tags as well as select or upload a product video for the item.
Images
Upload Images
To upload a specific image, click on the Upload Product Image button on the Media Tab. Then, browse your computer, select the image file, and click on the Open button.
Note: To upload multiple images, click on the first image, then hold the Control (CTRL) button on your keyboard while clicking on any additional images.

A thumbnail of the uploaded image will be displayed below.
Select from Media Library
The Media Library contains previously uploaded images. In the Select from Media Library section, click on the Media Library button.

A window with all previously uploaded images will display. If needed, you are able to upload new images in the Media Library by clicking on the Upload Images button. After making your selection, click on the Use Selected Media button.

A thumbnail of the uploaded image(s) will be displayed in the Manage Images section.
Image Requirements
For ASI to visually represent your products on ESP in the best manner, at least one image must be associated with each product. Products without images won’t be active or available to distributors searching ESP.
We recommend that both blank and decorated images be uploaded for each color/shape variation of the product. This gives distributors the visual representation of the decorated item they need, while also enabling them to use the blank image to create a virtual sample for their client.
All images must meet the image requirements below:
- Size (pixels):
- Recommended 2400x2400
- Maximum = 10 MB
- Minimum is 600x600
- Resolution:
- Recommended: 300 DPI
- Maximum: 600 DPI (better quality images help drive customers to your products)
- Minimum: 72 DPI
- Accepted File Types:
- JPG
- PNG
- Images MUST NOT contain:
- Any marketing verbiage
- Product numbers
- Watermarks
- Contact information
- Contain any reference to the Pantone/PMS numbering system. For example – 'PMS-123' is not permitted. Use 'Yellow-123' instead.
- A colored border
- Unauthorized trademarks and/or logos without proper authorization. See link for most recent list of logos and trademarks that require authorization: http://www.asicentral.com/unauthorized-logos.
- File Size:
- Maximum 10 MB (any file over 5MB should be compressed)
- Image aspect ratio (relationship of height to width) must be maintained when re-sizing images.
- Please put multiple image files in a Zip folder when sending to ASI for processing .
- Make sure the file name for your main image matches the product number, for example, DS154.jpg.
- Name additional images by product number and color/shape, for example DS154-red.jpg.
- Upload both decorated and blank versions of the images. This allows distributors to see examples of the item imprinted and/or create a virtual sample for their client.
Note: When using multiple images, tag the images with attributes like color and shape to ensure the appropriate image displays in search results and increase the likelihood that a distributor views it.
Don't forget to upload your Company Logo!
Manage Images
Images will be listed in the order in which they were uploaded. Use the icon with the three horizontal lines to drag and drop images into the order you would like. The first image will be the main, default image. To make a different image the main image, use the Set as Default link and that image will automatically be moved to the number one spot. Click the magnifying glass to view the image in a new tab in its actual size. The default image will have a grey background. Click the "X" to remove an uploaded image or use the Clear All button to remove all images from this product.
The next step is to add tags for the image(s). There are two types of tags: Media Tags and Criteria Tags.
- Media Tags
Media Tags will help determine the location of the imprint on the product. This is different from criteria tags which are used to tag the image with attribute information, such as color and shape. Use the Image View dropdown to indicate the angle in which the photo of the image was taken and then use the available options for Image Display, Decoration, Resolution, and Alternate Views to provide as much information as possible.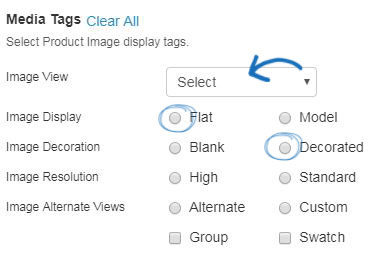
- Criteria Tags
By adding tags to an image, you are establishing a direct relationship between the image and the product attributes in the tags. Click on the Add Tags button.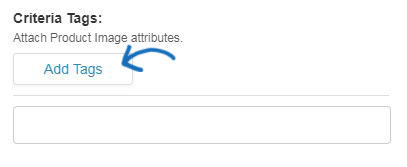
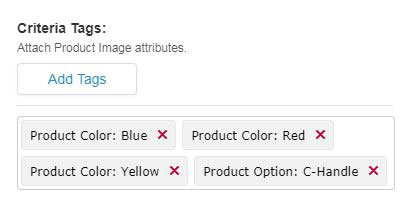
Then, use the available checkboxes to select the attributes which apply to the image.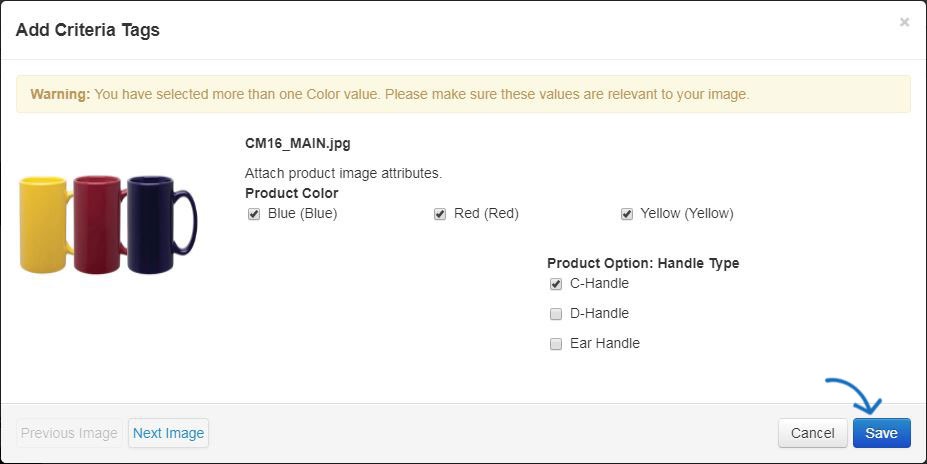 When you are finished, click on Save. All of the selected attributes will be listed as individual tags.
Videos
Upload a Video
To add a new video, click on the Add Video button and select Upload New Video.

This will open the Add Video section of the Media Library, where you are able to configure the information for the new video. For more information on how to do this, please review the Add Products to a Video section of the Media Library article.
Manage Videos
To associate a product video with a product, go to the Select from Media Library section and click on the Media Library button. Select the video you would like to associate with this product. Only one video can be applied per product. After selecting the video, click on the Use Selected Media button.
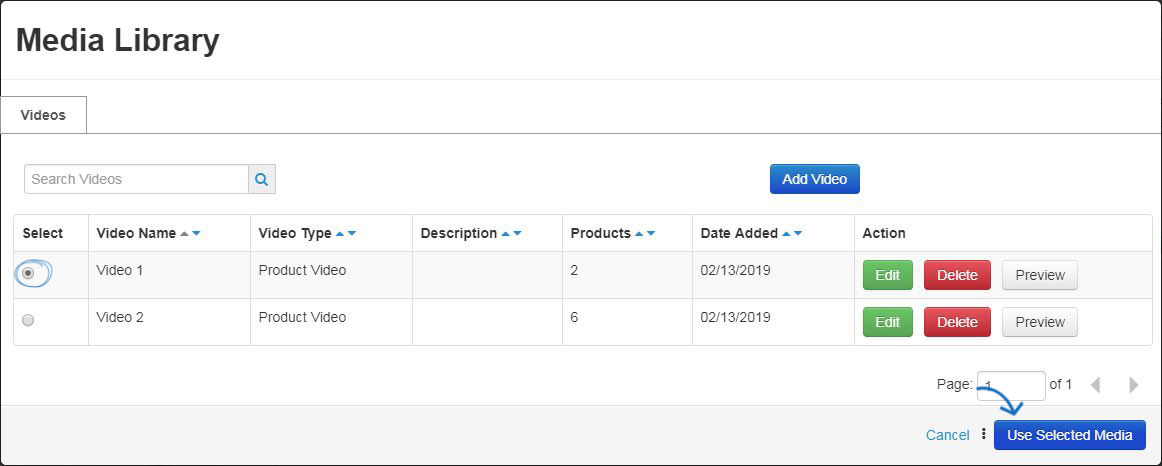
For more information on uploading and managing product videos, please refer to the Videos section of the Media Library article.

 Français