


The Imprinting consists of the information regarding the decoration available for the item. A product cannot be made active without imprint method information.

If imprinting is not available for the product, leave the imprint method dropdown as (Select Method) and check the "Unimprinted" box.

Within the Imprinting tab, you are able to add, edit, or remove:
Imprint Method
The Imprint Method is the type of decoration available for the product (silkscreen, embroidery, hot stamp, etc). To modify the imprint method for a product, click on the Imprinting tab and go to the Imprint Methods section. Select the type of imprinting method from the Select Method dropdown menu and then click on the Add button.
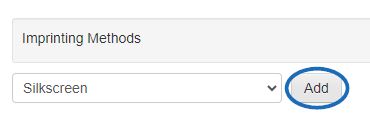
The selected Imprint Method will be added as Imprint Method #1. Repeat this process to list additional imprint methods. If you do not see the type of imprint method you provide, select "Other" from the dropdown and enter the imprint method in the Name field. To include an additional charge for an imprint method, click on the Apply an Upcharge button to add it in the Pricing area. If the Apply an Upcharge button is grayed out, click on the Save button at the top.
Personalization
After selecting the imprint method, you can indicate if personalization is available for this product. Check the Personalization box and then use the dropdown to select the imprint method used for the personalization.
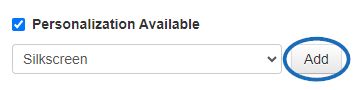
The imprint personalization will be added as Personalization #1. Repeat this process to list additional personalization methods. If you do not see the type of imprint method you provide for personalization, select "Other" from the dropdown and enter the imprint method in the Name field.
To include an additional charge for a personalization method, click on the Apply an Upcharge button to add it in the Pricing area. If the Apply an Upcharge button is grayed out, click on the Save button at the top.
Imprint Colors
If the imprint method is available in one or multiple colors, you can enter the color(s) by going to the Imprint Details section.
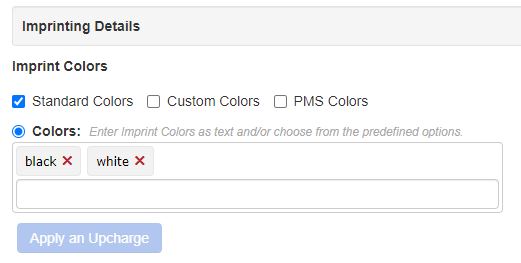
In the Imprint Colors area, select the whether the colors are:
Standard and/or Custom Colors
If the available imprint colors are standard and/or custom by checking the appropriate box(es). Then, type the names of the imprint color(s). After entering an imprint color, type a comma or hit enter. Using a comma or hitting the Enter or Tab key after typing a color will add the color as a "pill" (individual imprint color option). To remove a color "pill", click on the red "X".
To include an additional charge for the imprint color(s), click on the Apply an Upcharge button to add it in the Pricing area. If the Apply an Upcharge button is grayed out, click on the Save button at the top.
PMS Colors
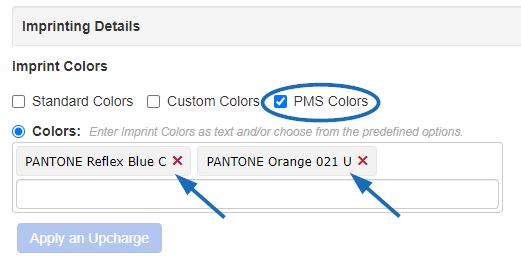
If the available imprint colors are PMS (Pantone Matching System) colors, check the PMS Colors box. Then, type the names of the imprint colors. After entering an imprint color, type a comma or hit enter. Using a comma or hitting the Enter or Tab key after typing a color will add the color as a "pill" (individual imprint color option). To remove a color "pill", click on the red "X".
To include an additional charge for the imprint color(s), click on the Apply an Upcharge button to add it in the Pricing area. If the Apply an Upcharge button is grayed out, click on the Save button at the top.
To add PMS Colors using only their numeric codes, select the PMS# option and then type the values for the colors. Using a comma or hitting the Enter or Tab key after typing a color will add the color as a "pill" (individual imprint color option). To remove a color "pill", click on the red "X".

To include an additional charge for the imprint color(s), click on the Apply an Upcharge button to add it in the Pricing area. If the Apply an Upcharge button is grayed out, click on the Save button at the top.
If certain imprint colors are only available for a specific imprint method, you are able to define this relationship in the Availability tab. After adding or editing the information, click on the Save button. To include an additional charge for an imprint color, click on the Apply an Upcharge button to add it in the Pricing area. If the Apply an Upcharge button is grayed out, click on the Save button at the top.
Production Time
In the Production Time Details area, enter a whole number in the Time box for the standard production time. You are able to enter a range, such as 7-10 if necessary. Enter additional information regarding this production time in the Details field. To add more than one standard Production Time for a specific product, click the Add another Production Time button.
Rush/Same Day Service Offered
If rush service is available for this item, check the Rush Service Offered checkbox and enter a whole number in the time box for the rush time. You are able to enter a range, such as 3-5 if necessary. Add any additional information regarding the rush time options in the Details field. You can use the Add another Rush Time button to add more rush times if needed. After adding or editing the information, click on the Save button.
To include an additional charge for a rush, click on the Apply an Upcharge button to add it in the Pricing area. If the Apply an Upcharge button is grayed out, click on the Save button at the top.
Check the Same Day Service Offered checkbox if this option is available for this product. You can also enter details if needed.
To include an additional charge for same day service, click on the Apply an Upcharge button to add it in the Pricing area. If the Apply an Upcharge button is grayed out, click on the Save button at the top.
Imprint Size and Location
The Imprint Size and Location defines the dimensions and placement of the imprint. Type an imprint size and location in the respective Size and Locations boxes. For example, an imprint size would be 2" x 2" and an imprint location would be the location of the imprint on the item, such as "Top", "Side", "Front", etc. If you have a specific code which represents the imprint location, enter it in the code field.
You can also use the Add another Size and Add another Location buttons, respectively.
To include an additional charge for an imprint size or location, click on the Apply an Upcharge button to add it in the Pricing area. If the Apply an Upcharge button is grayed out, click on the Save button at the top.
Additional Colors and Locations
Use the Additional Colors Information or Additional Location Information details box to enter any extra colors or additional location information which can be added to the imprint.
To include an additional charge for an additional imprint size or location, click on the Apply an Upcharge button to add it in the Pricing area. If the Apply an Upcharge button is grayed out, click on the Save button at the top.
After adding or editing the information, click on the Save button.
Artwork Information
To enter art services, paper proof, virtual proof, and/or pre-production proof information, click on the Add Artwork Information to this Method button. Check the boxes that apply and enter additional information in the Comments field.
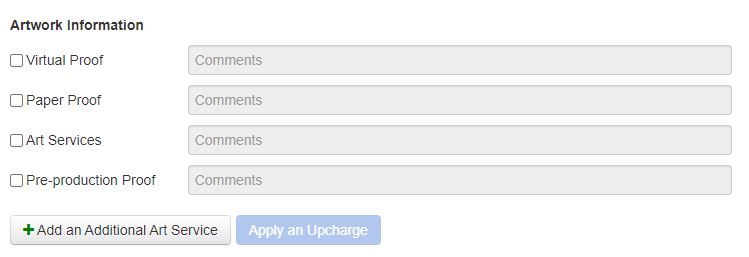
If you need to enter additional Art Services, click the Add Additional Art Service link at the bottom of the window.
To include an additional charge for an art service, click on the Apply an Upcharge button to add it in the Pricing area. If the Apply an Upcharge button is grayed out, click on the Save button at the top.
Artwork Template
Artwork templates can help demonstrate the best way to decorate a product. Templates can be added by uploading a PDF or entering the URL then typing the name for the artwork template.
Samples
To add sample options, click on the Imprinting tab and scroll to the Samples section. Check the Product Sample or Spec Sample box to indicate that these options are available for this product. Once the option is checked add any additional information that applies to the sample in the Details field.
To include an additional charge for a sample, click on the Apply an Upcharge button to add it in the Pricing area. If the Apply an Upcharge button is grayed out, click on the Save button at the top.
Options
You are able to add custom imprint options in this section. Click on the Add a Custom Imprint Option. The Add an Option window will open. You will be prompted to indicate whether this option is required for ordering. Next, select "Imprint" from the Option Type dropdown.
Enter a brief Option Name in the Option Name field. Type the value(s) for the option and then hit Enter, Comma or Tab on your keyboard. Note: When entering values, enter them individually; not as a grouped value. For example, enter "A", "B", "C" not "A, B, or C".
If only one option value can be ordered check the "Can only order one" checkbox. Enter any additional information which may apply to this option. To include any additional charges for the option, go to the Pricing Tab.
When you are finished, click on Apply to return to the Basic Detail tab or click on Apply & Add to create another option for this product.
Additional Imprint Information
Use the Additional Imprint Information box to add more details about the available imprinting on this product. Do not enter upcharges in this section. Additional charges should be added as an upcharge in the Pricing tab.