


Virtual samples are an effective way to showcase the end buyer's logo on a product without having to order a physical sample. By uploading a logo to display on all virtual sample enabled products, you can help your customer visualize the final product.
To create a virtual sample in ESP Web, click on the design icon from the List, Grid, or Image views. In the Detail view, you can click on the Create Virtual Sample button. The Design Studio will open in a new tab.

Check out the ESP Virtual Sample Design Studio tutorial video.
What are Virtual Samples and why should I use them?
Virtual samples are an effective way to showcase the end buyer's logo on a product without having to order a physical sample. Using Virtual Samples when presenting products to your customer is a helpful tool to help them visualize the final product.
The Virtual Sample tool in ESP enables you to not only upload logos, but also add text, clipart, and shapes to the product. The ability to create and manage layers gives you more flexibility when designing virtual sample images.
Create a New Virtual Sample
If a product is virtual sample enabled, you will be able to click on the Create a Virtual Sample button. The "My Product Designs" window will open and display any previous designs you have created for that product. You can select an existing design to edit or click on the Create New button to begin a new design.

Use the Design Studio
Add Text
To add text to a product, click on the Add Text option to open the Edit Text window.
In the Edit Text area, you can type the text you would like to include on the product. Then, use the available options to configure the look of the text. Use the Font dropdown to select the font style. If you have entered more than one line of text, enter an amount in the line spacing to set the desired spacing between the two lines of text. If you want to use two unrelated lines of text, it is recommended you add a second layer rather than use spacing. For more information on using layers, please review the "Design Layers" section.
To change the text color, click on the color swatch in the Text Color area. You can select a standard color or choose a custom one. Click on the custom color swatch to select a color from the spectrum or enter a HEX code. If you need to enter an RBG or HSL code, use the arrows to scroll to those options. Click on Apply and then click on Done.
Use the Text Align options to align the text within the text box and use the Text Style to bold, italicize, underline, or strike-through the text.
Click on the slider to indicate you would like to curve the text. Then, use the additional options such as Reverse Curve, Curve Radius, and Spacing to make the text look how you would like.

You can also use the Center and Flip options to change the text, as well as use the rotation slider.
Additionally, on the text box itself, there are four options:
- Curved Arrow: Rotate the text box.
- Two Arrows: Enlarge or shrink the text box.
- Four Arrows: Move the text box.
- Red Garbage Can: Remove the text box.
Upload Artwork
To upload an image, click on the Upload Artwork option. Images must be under 4MB in size and in a .png, .jpg, .jpeg, .gif, or .svg format.
Click on the Upload File button, browse your computer, select the file you would like to upload, and then click on the Open button.
If your logo has a white background, use the slider to remove it. You can also use the sliders to manage the transparency level and rotation of the logo.
You can also use the Center and Flip options to move the logo.
In the Edit Art section, there are filter options available which enable you to display the art as using:
- Gray-scale
- Sepia
- Invert
- Emboss
- Sharpen
For example, if the logo has black text and the product is a black mug, removing the white will make the logo practically invisible. However, using the filters to invert the logo will really make the logo pop.
Additionally, on the art box itself, there are four options:
- Curved Arrow: Rotate the art.
- Two Arrows: Enlarge or shrink the art.
- Four Arrows: Move the art.
- Red Garbage Can: Remove the art.
Use Clipart
You are able to use Clipart images by clicking on the Clipart option. Clipart images can be flat icons, shapes, quotes, and/or badges. For example, if you were doing a blue ribbon promotion and needed a standard ribbon to show your customer, click on the Clipart option. Then, use the dropdown to select "Badges" and locate the ribbon you would like to use. Most Clipart is shown in black, but you are able to change the color. Move and resize the Clipart to appear how you would like on the product, then use the Edit Clipart options to configure it. You can select a fill color, center, or flip the Clipart. You can also use the sliders to change the transparency or rotate the Clipart.
Additionally, on the art box itself, there are four options:
- Curved Arrow: Rotate the art.
- Two Arrows: Enlarge or shrink the art.
- Four Arrows: Move the art.
- Red Garbage Can: Remove the art.
Designs
Designs are previously created virtual samples. For example, if you previously created a virtual sample consisting of clipart and text, that image will be saved as a Design. In the Designs section, there are two options: All Designs and My Designs.

The All Designs contains designs created by all users within your company, whereas the My Designs will contain only designs you created. You can use the search bar to enter keywords to search through saved designs.

Change the Product color
If the supplier has provided virtual sample enabled images for multiple colors of the product, you will be able to select from the available options in the Product Colors section. Click on Product Colors and then select the color you would like to work with.

At any point when creating a virtual sample, you can change the product color.
What are Layers?
All artwork and text will be added to the product in layers, similar to Adobe Photoshop. This means if you are creating a virtual sample that contains more than one element (for example: text and art), you are able to use the layer options to make designs. For example, if you are working with two clipart images, each image becomes a layer. The first layer is the base layer and each additional layer will be shown on top.
Manage Layers
The options on the Layers toolbar are: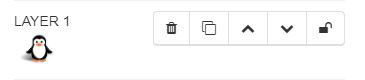
- Garbage Can: Delete the layer.
- Copy: Clone the layer. Copied layers will automatically be shown as the top layer.
- Up Arrow: Move the layer up one place.
- Down Arrow: Move the layer down one place.
- Padlock: Lock the layer.
How do I move layers together?
If you need to move the layers together, use the Select All option. Then, use the four arrows icon to move the layers to the desired location. If a layer is locked, it will not move with the rest of the layers.
My Virtual Sample is Ready! What's My Next Step?
After you have completed designing the virtual sample, you can download or send the virtual sample image, as well as order the product. The first step is to save the design.
Saving a virtual sample will store it in the Designs section of your CRM. Click on the Save/Share button at the bottom.
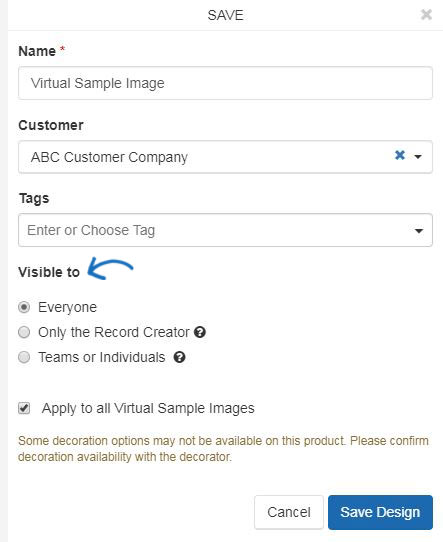
In the Save window, enter a name for this design. Then, choose the customer. If you would like to tag the design, you can enter or select a tag using the Tags dropdown. Tags enable you to assign this design to a grouping, such as for a theme or shape. For example, if the design was for a specific holiday, you could create a tag for holiday. Then, when you are searching for holiday designs at a later date, you'll be able to click on the holiday tag and see all tagged designs. Select the visibility level for the virtual sample:
- Everyone: All users within your organization can view this virtual sample.
- Only the Record Creator: Only you will be able to view and edit this virtual sample.
- Teams or Individuals: You select the team of users or individual users that will be able to view the virtual sample.
When you are finished entering the information, click on the Save button.
Once the design is saved, the Success window will appear.

From the Success window, you will have the option to:
Download the Design
To save a copy of the virtual sample to your computer, click on the Download button from the Success area. The options for download will be listed. Click on the link to download the design with the product or just the design itself in any of the available file types listed.
Send via Email
To send an email containing this design, click on the Send button in the Success area.
Next, enter your customer's email address in the To: field. As you type, matching results from your CRM will be displayed and you are able to select the recipient.
Order/E-Comm Order
Create an order for this product. The button will read as "Order" for suppliers who are not E-Comm connected and "E-Comm Order" for suppliers who are E-Comm connected.
Go to Design Library
Opens the Designs section of CRM and enables you to view all previously created virtual samples.
Back to Product
Returns you to the Detail page for the product.
Order a Virtual Sample
If you would like to order the product, click on the Order button. Keep in mind, if the supplier is E-Comm Connected, the button will display as "E-Comm Order". The design you created will be displayed as the thumbnail image for the item.
Enter the quantity you need for each available option in the box below the attribute. The Order Summary will appear to the right. Click on the Continue button.
The Decoration information will appear. You can select an imprint method, upload a logo or enter information about the imprint location name, imprint color or decoration instructions. Next, click on the Continue button.

Use the dropdown to select your customer.
Note: If you are working with a new customer, click on the Add New Customer link. You will be able to enter the customer's name and then click on Create Customer.
After selecting your customer, click on the Create Order button. Then, begin filling in the order form.
Retrieve a Virtual Sample
To retrieve a virtual sample, go to CRM.

All previously created designs will be available in this section.

 Français
 Español