


To add a new appointment, log into www.SearchESP.com and then click on the CRM tab.

Next, click on the Appointments options.

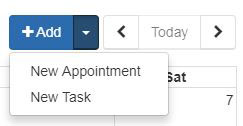
Click on the Add button to create a new appointment. Use the arrow on the Add button to select New Appointment or New Task.
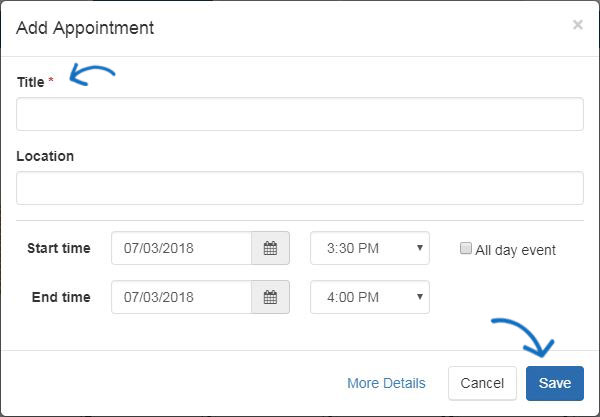
The title for the appointment is required. You can also enter a location, which is where the appointment will be held. Use the calendar icon to select a date for the start time and then use the dropdown to select a time. If the appointment is an all day event, check the box to the right of the Start time options. To set an end time, use the appropriate calendar icon and dropdown.
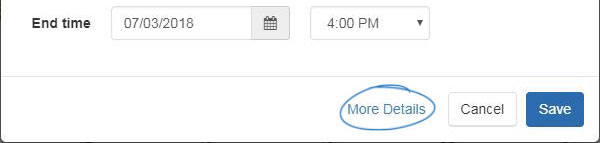
The More Details button enables you to include a description, notification(s) and visibility options for this appointment. Click on the More Details link.
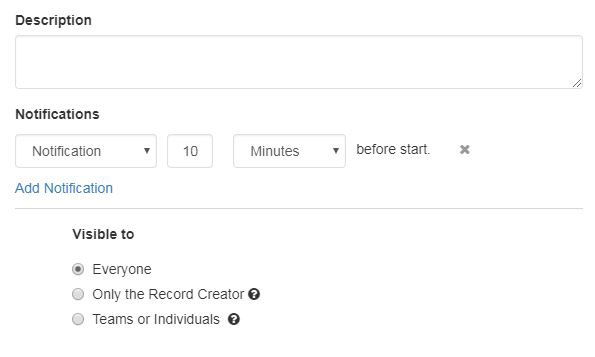
There are four options for setting the visibility of this appointment. Setting the visibility enables you to control which users of ESP within your company will be able to view this appointment:
- Everyone: All users within your organization.
- Only the Record Creator: Only you will be able to view and search for this company.
- Teams or Individuals: You select the team of users or individual users which will be able to view this company information.
Then, click on Save when you are finished. The appointment will be added to the calendar.
 Français
 Español