


Email Marketing enables you to create recipient lists using contacts from your CRM or by uploading a file with contact information. In the Lists area, you can also manage your lists using the available options. When creating an email marketing list, if two contacts have the same email address, only the first contact will be added to the list. This automatic functionality ensures that duplicate email addresses are not added to the same list.
What would you like to do?
Create a List
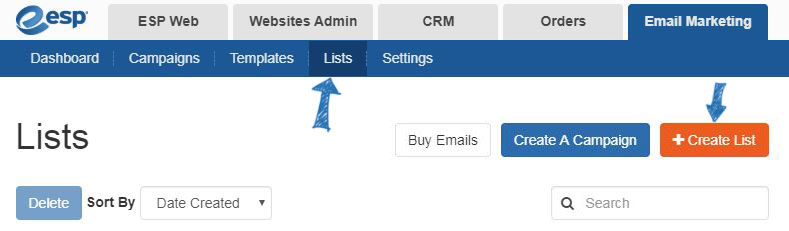
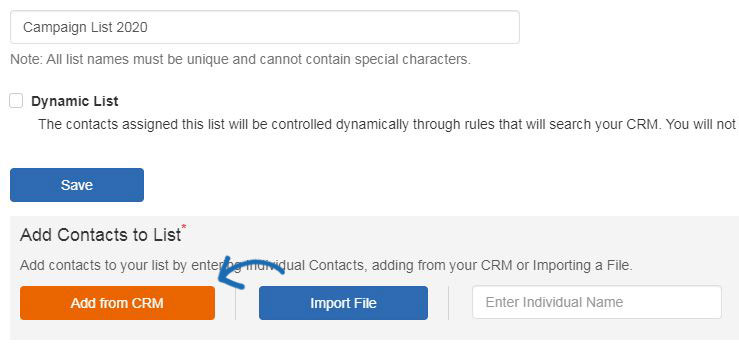
To create a new list, click on the Create A List button from the Email Marketing Homepage or within the Lists section, click on the Create List button.
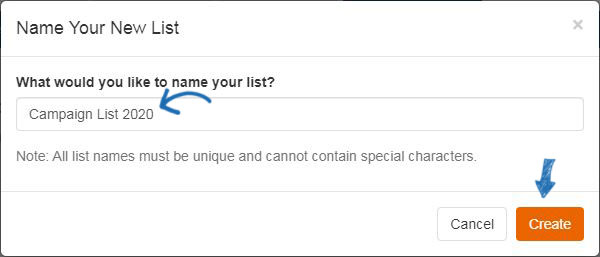
Enter a name for the new list and then click on the Create button.
Add Contacts to an Email Marketing List
Use a Dynamic List
Dynamic lists enable you to create rules for adding contacts to a list. For example, if you are promoting a local event and want to ensure that all contacts within a specific postal code are included, you can click on the Add New Rule link and then use the dropdown to select postal code. To expand the area, use the Match Any Option, click on the Add New Rule, and add another postal code.
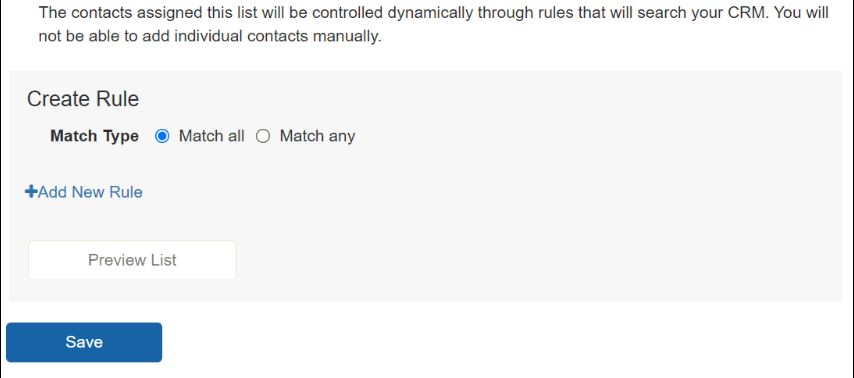
Choosing "And" means that contacts must fit all rules. Choosing "Any" means that contacts must fit at least one of the rules. For example, let's say you wanted to send out an email campaign to your healthcare contacts. You have the contact tagged in CRM, but some are tagged as "medical" and others have a "healthcare" tag. You have the option to use only one tag, both tags, or either tag.
Click on the Add New Rule link and then use the dropdown to select "Tags". Then, you can type the tag name, "medical", in the box and then click on the Preview List button. All contacts which have been tagged with "medical" will appear in the list. Next, click on the Add New Rule link again, select Tags from the dropdown, and type "healthcare" in the box. Then, click on the Preview List button. Now, only contacts that have been tagged with both "medical" and "healthcare" will be shown. To include contacts that have been tagged as either "medical" or "healthcare", select the "Any of these tags" option. Then, click on the Preview List button again to see all contacts that contain at least one of the tags you have entered.
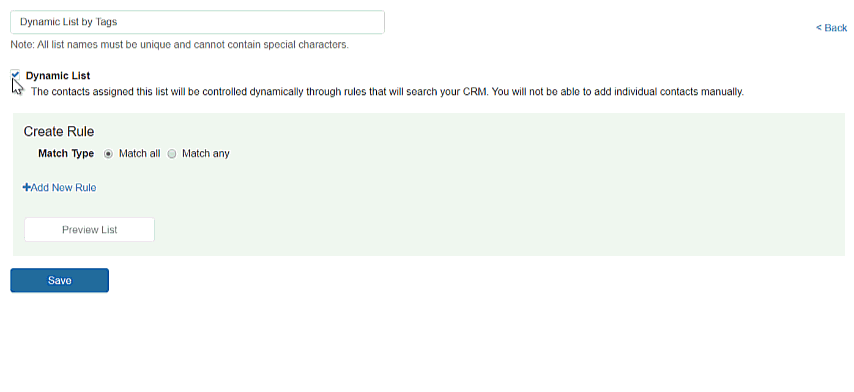
Note: Individual cannot be managed on dynamic lists.
Add from CRM
Click on the Add from CRM button.
All available contacts will be displayed. You can use the search, sort, and filter features to locate the contacts you would like to add to your list. Hover on a contact and click on the checkbox to select it. Then, click on the Add button.
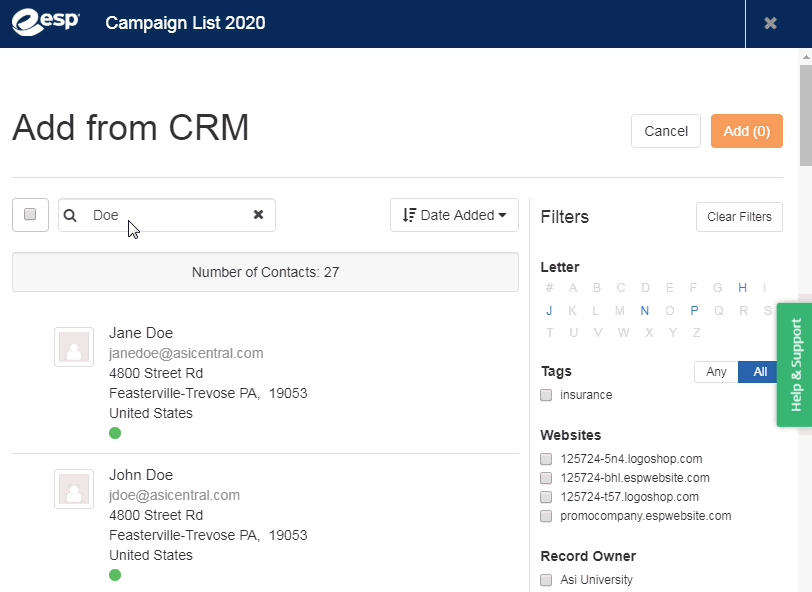
You can repeat this process as many times as you like to create your list.
Import a List
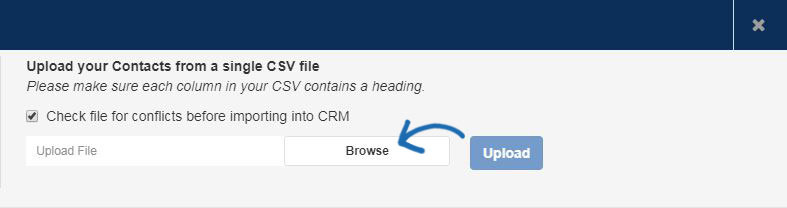
To import a contact list, click on the Import File button. Select the format of the file you want to import. The file must contain a contact first name, contact last name, and email address.
Note: If you are using a CSV format, make sure the first row contains a header for each column.

After you click on a file format, click on the Browse button to navigate to the file on your computer. Select the file, click on open, and then click on the Upload button.
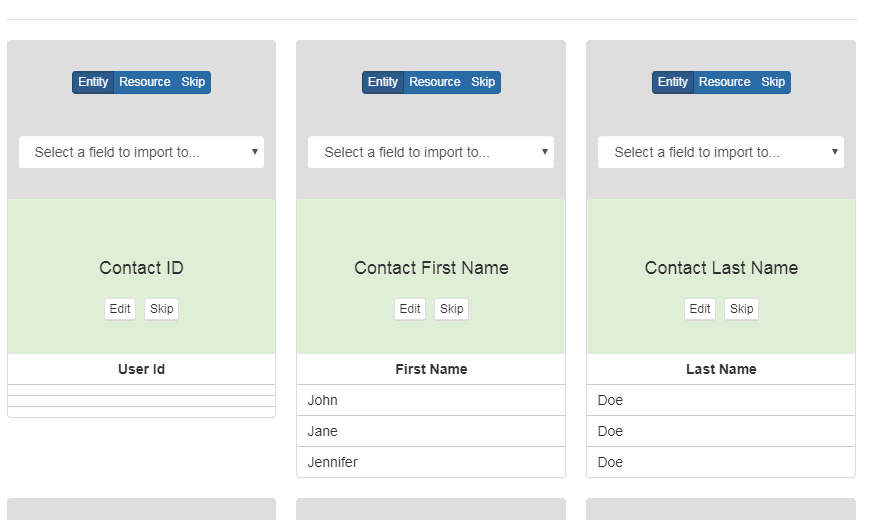
Map the fields from the file using the available options for company and contact information. The system will sometimes assign an option for a field, but you may also have to map some fields.
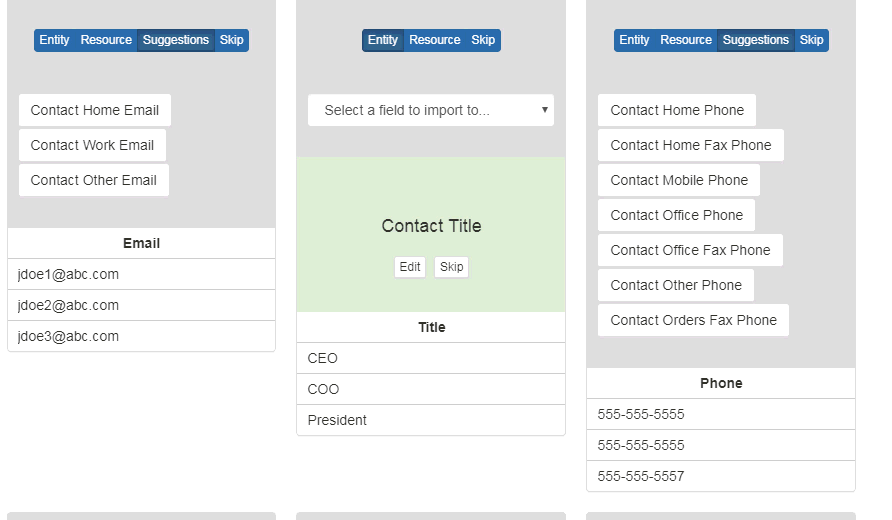
If there is a field in the uploaded file which you do not want to map, click on the Skip option.
Add an Individual Contact
You are also able to enter an individual from the CRM by typing the contact's name in this box.
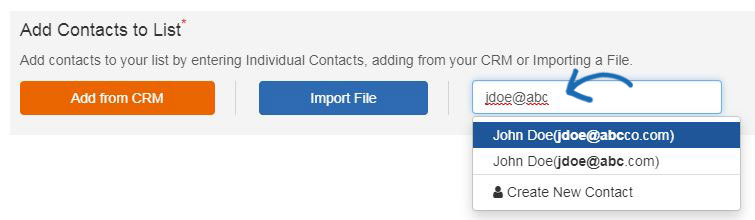
You can also use the Create New Contact option at the bottom of the dropdown to enter a new contact. Contacts added through this section will also be added into the CRM.
Manage Lists
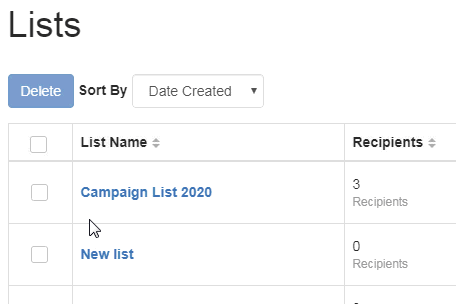
After a list is created, it will be available in the Lists section.

To delete a list, click on the garbage can icon within the list row or select the list(s) using the checkbox and then click on the Delete button.
 Français
 Español