


Within the Users section of the ESP Admin, administrators are able to manage their company's ESP users within ESP CRM and Orders. New users can be added by purchasing additional ESP licenses.
Click on the Avatar (user icon) in the upper right corner and then select Settings. Then, click on Users from the options on the left.
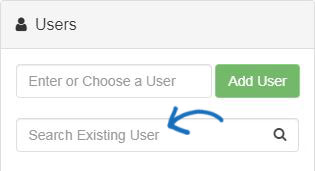
To locate an existing user, begin entering the user's first or last name in the Search Existing User box. As you type, matching results will display below the search box.
Each user listing has several options for permissions:
- Administrator: Provides administrative control of ESP Orders and CRM to the user.
- Create Invoice: Enables the user to create invoices.
- Create PO: Enables the user to create purchase orders.
- Data Exporter: Enables the user to export data from ESP Orders and CRM.
- Email Marketing: Enables the user to send email marketing campaigns.
- Orders: Enables the user to send order documentation.
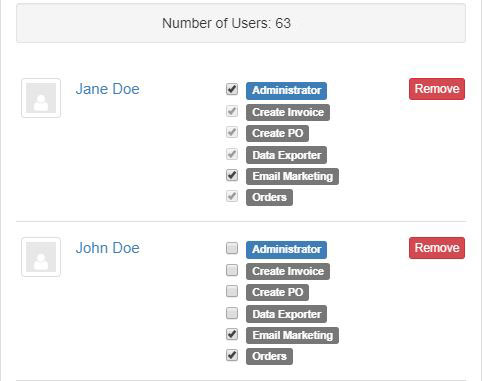
Note: If a user has been marked as an administrator, they will automatically be designated as able to create invoices, purchase orders, and export data.
Add New Users/Update Existing User Information
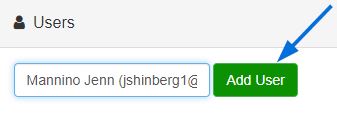
To add a new user, there must be an unassigned license with a user account (also known as a single sign-on or SSO) available for your organization. Begin typing in the Enter or Choose a User box.
- If no options appear, please contact your ASI Account Executive to purchase an additional license for ESP Web.
- If one or more options do appear, click on the name of the user you would like to add. Once the user is selected, click on the Add User button.
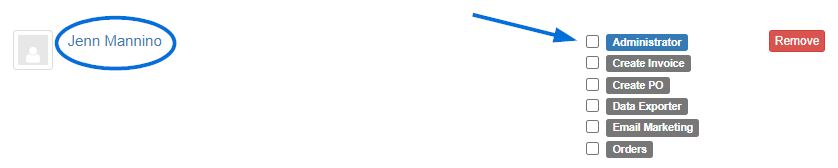
Newly added users should appear at the top of the user list, but if they do not, use the Search Existing User to enter their name.
After locating the user; use the checkboxes to select/deselect the appropriate licenses for that user. Click on their name to update any of their personal information.
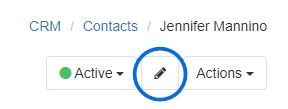
The user's information will open in the CRM. Click on the pencil icon to open the record and begin editing the user's information.
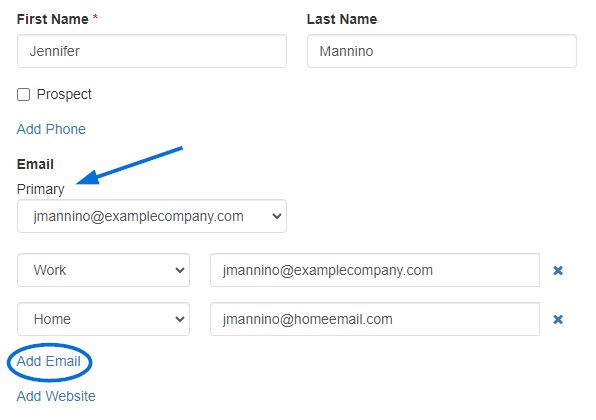
While only the user's first name is required, providing both a first and last name is recommended. You can also use the available links to add phone number(s), email(s), and/or website(s). If you add more than one option for any of these fields, you will be prompted to select a primary.
When you are finished, click on the Save button at the bottom.
To ensure the user's information has been updated, return to Settings, click on the Users option, and locate the user. The user listing should reflect your changes.

Note: Usernames can be modified by the individual user in the Manage My Account section. Administrators can update their employee's usernames by contacting the ASI Technical Product Support team.
 Français
 Español